WebMail
  Support
Custom SSL (Commercial / Paid Certificate)
Panel path: Domains → Custom SSL (and Domains → Custom SSL / SSL Wizard for CSR)
Install a paid commercial, OV/EV, or wildcard certificate. Full flow: create a CSR → buy the certificate from an SSL provider → install the issued files in CWP.
When to use Custom SSL
Use this path when you need a paid certificate (Organization/Extended Validation, multi-domain SAN, or wildcard *.example.com). For a free Domain-Validated cert, use AutoSSL (Let’s Encrypt) instead.
Step A — Create a CSR (Certificate Signing Request)
-
Confirm the domain is already added under Domains → Domains and DNS points to this server (or will point here before the provider’s validation).
-
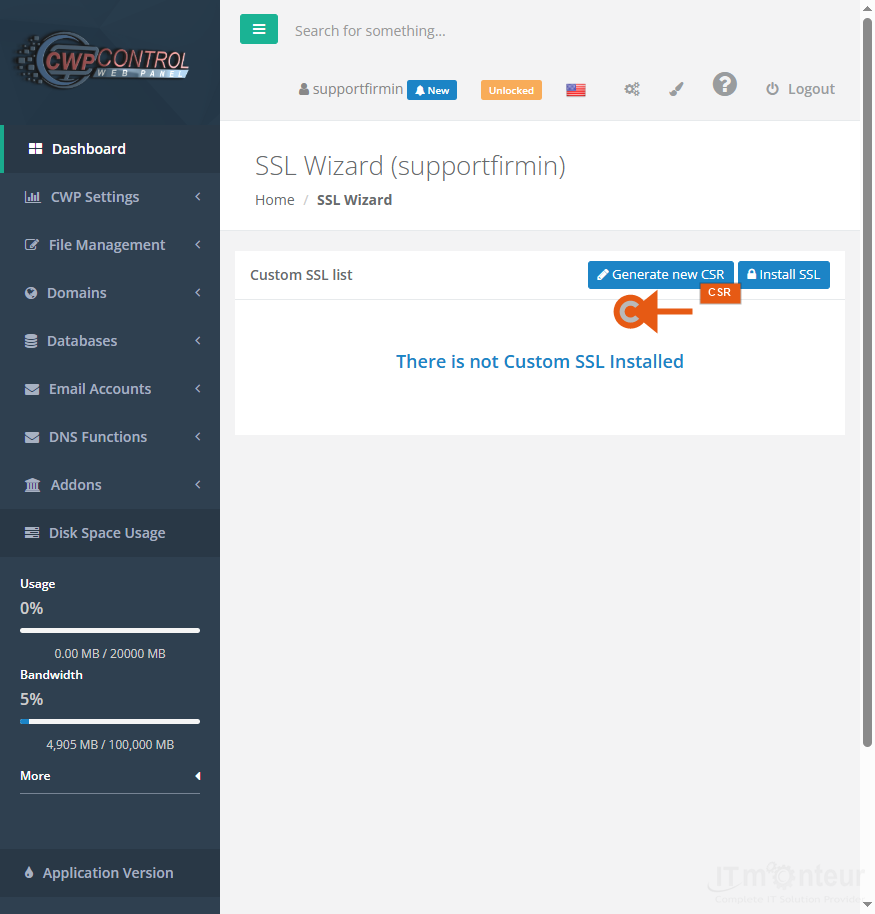
Open Domains → Custom SSL (SSL Wizard). Click Generate new CSR (orange arrow in the screenshot).

Step A1 — Click Generate new CSR on the SSL Wizard page. -
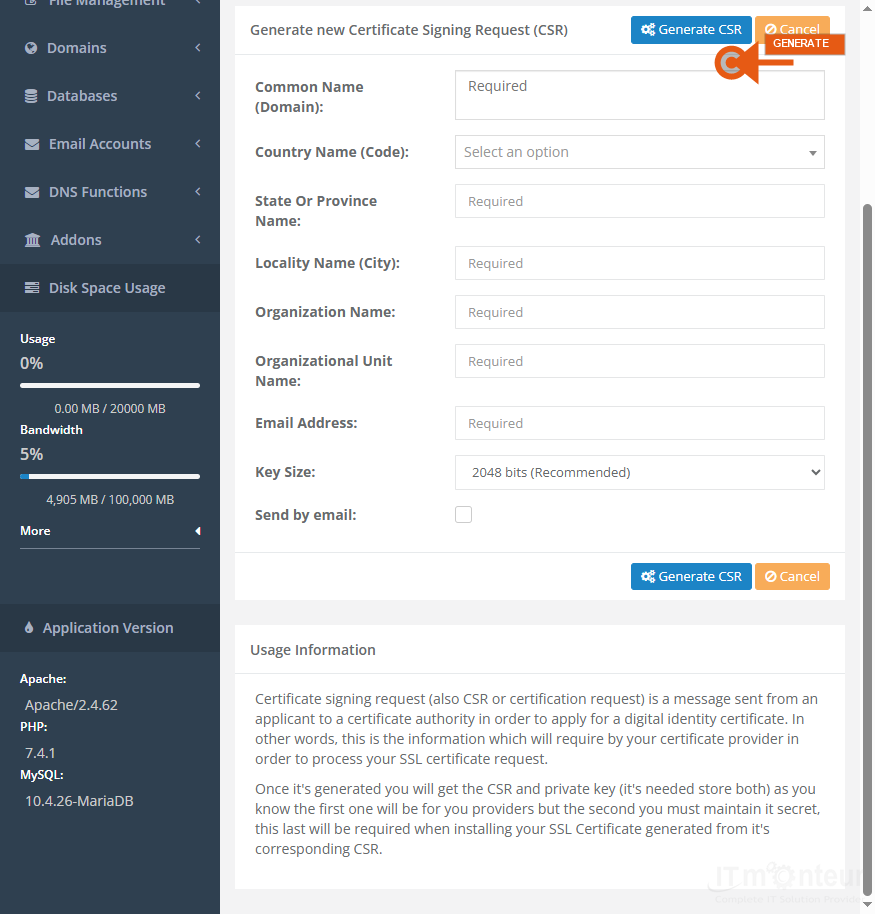
Fill the Generate new Certificate Signing Request (CSR) form: Common Name (domain), Country, State, City, Organization, Organizational Unit, Email, and Key Size (2048 recommended). Then click Generate CSR.
Step A2 — CSR form fields and Generate CSR button. -
After generation, copy and store both pieces securely:
— The CSR text (starts with-----BEGIN CERTIFICATE REQUEST-----) — paste this at your SSL provider
— The private key — keep secret; never send it to the SSL provider -
If the panel stores the key automatically, note where it is kept. Losing the private key means you must create a new CSR and reissue the certificate.
Step B — Purchase the certificate from an SSL provider
- Choose a commercial SSL product that matches your need (single domain, multi-domain SAN, or wildcard). Common vendors include DigiCert, Sectigo, GlobalSign, GoDaddy, Namecheap, and similar CA resellers — or ask IT Monteur sales if you want the cert bundled with hosting.
- During checkout / issuance, paste the <strong>CSR</strong> when the provider asks for it. Do not paste the private key.
- Complete domain control validation as the provider requires (HTTP file upload, DNS CNAME/TXT record, or email to admin@ / webmaster@). If DNS validation is used, add the TXT/CNAME in <strong>DNS Zone Editor</strong> (or at your registrar if nameservers are external).
- After approval, download the issued files. Typical package: your domain certificate (.crt / .pem), CA intermediate / chain / bundle, and sometimes a PKCS#7 or ZIP. Keep the private key from Step A — the vendor usually does not send it back.
Step C — Install the certificate in Custom SSL
-
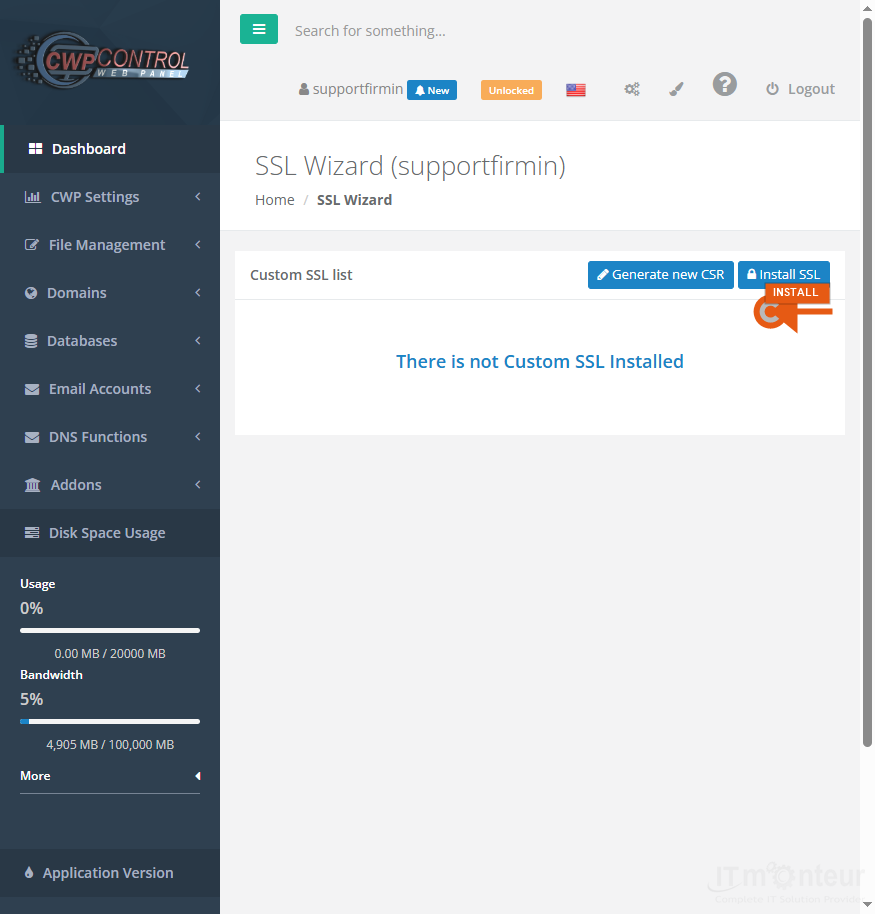
Return to Domains → Custom SSL (SSL Wizard). Click Install SSL.
Step C1 — Click Install SSL on the SSL Wizard page. -
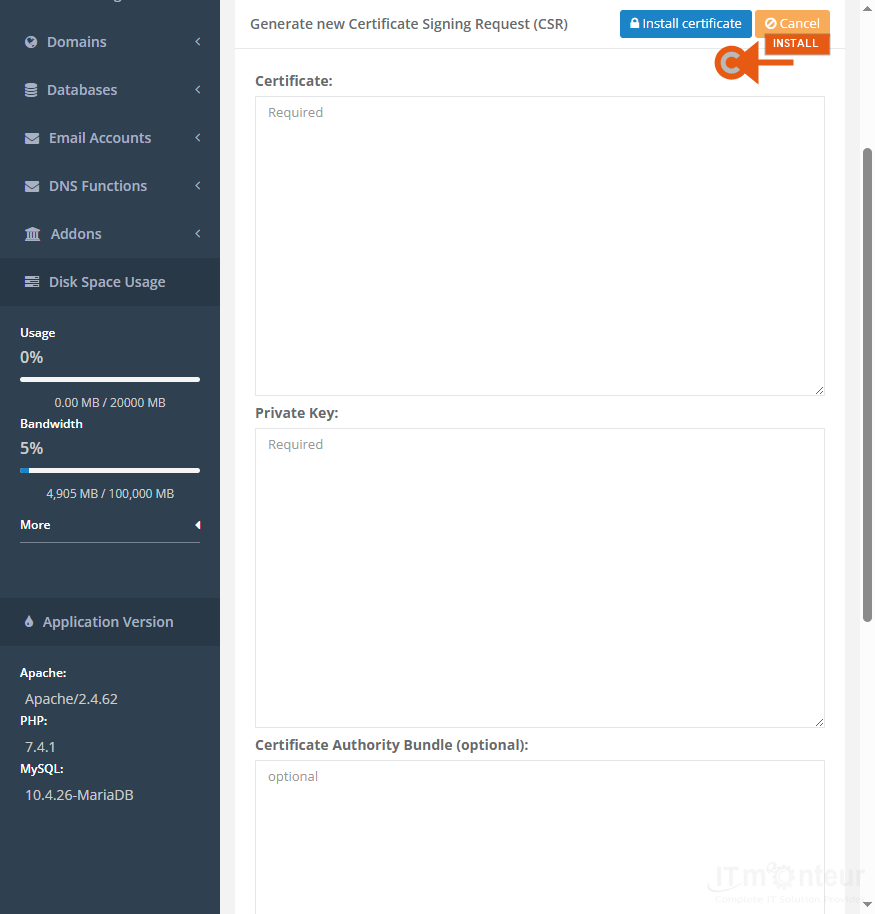
Paste or upload:
— Certificate (your domain .crt)
— Private Key (the key generated with the CSR)
— Certificate Authority Bundle (optional but recommended chain from the provider)
Then click Install certificate.Step C2 — Install SSL form (Certificate, Private Key, CA Bundle). -
Open
https://yourdomain.comand confirm the padlock and certificate details (issuer, expiry, hostname). Fix mixed-content (HTTP images/scripts) if the padlock is broken. -
If install fails, usual causes are: private key does not match the certificate, wrong intermediate bundle, CN/SAN does not match the selected domain, or leftover Let’s Encrypt files conflicting — remove the mismatch and reinstall.
Renewals
- Commercial certificates expire (often 1 year). Start renewal before expiry: either reuse the same CSR/key if the vendor allows, or generate a fresh CSR and install the new files the same way.
- Calendar a reminder 30 days before expiry. After renewal, reinstall the new certificate + bundle in Custom SSL (private key stays the same only if you reused the same CSR/key pair).
Notes
- Never email or ticket-upload your private key. Share only the CSR with the SSL provider.
- Wildcard certs need CN or SAN like *.example.com; they usually do not cover the bare apex (example.com) unless that name is also included — check the product details.
- If Cloudflare orange-cloud proxy is on, origin SSL mode (Full / Full Strict) must match the certificate installed on this server.