WebMail
  Support
Email Forwarders
Panel path: Email Accounts → Email Forwarders
Forwarders (aliases) send mail addressed to one name at your domain to another mailbox or external address.
Understanding Forwarders
An alias such as sales@yourdomain.com can redirect to admin@yourdomain.com without storing mail locally unless you also add a mailbox.
Creating a Forwarder
-
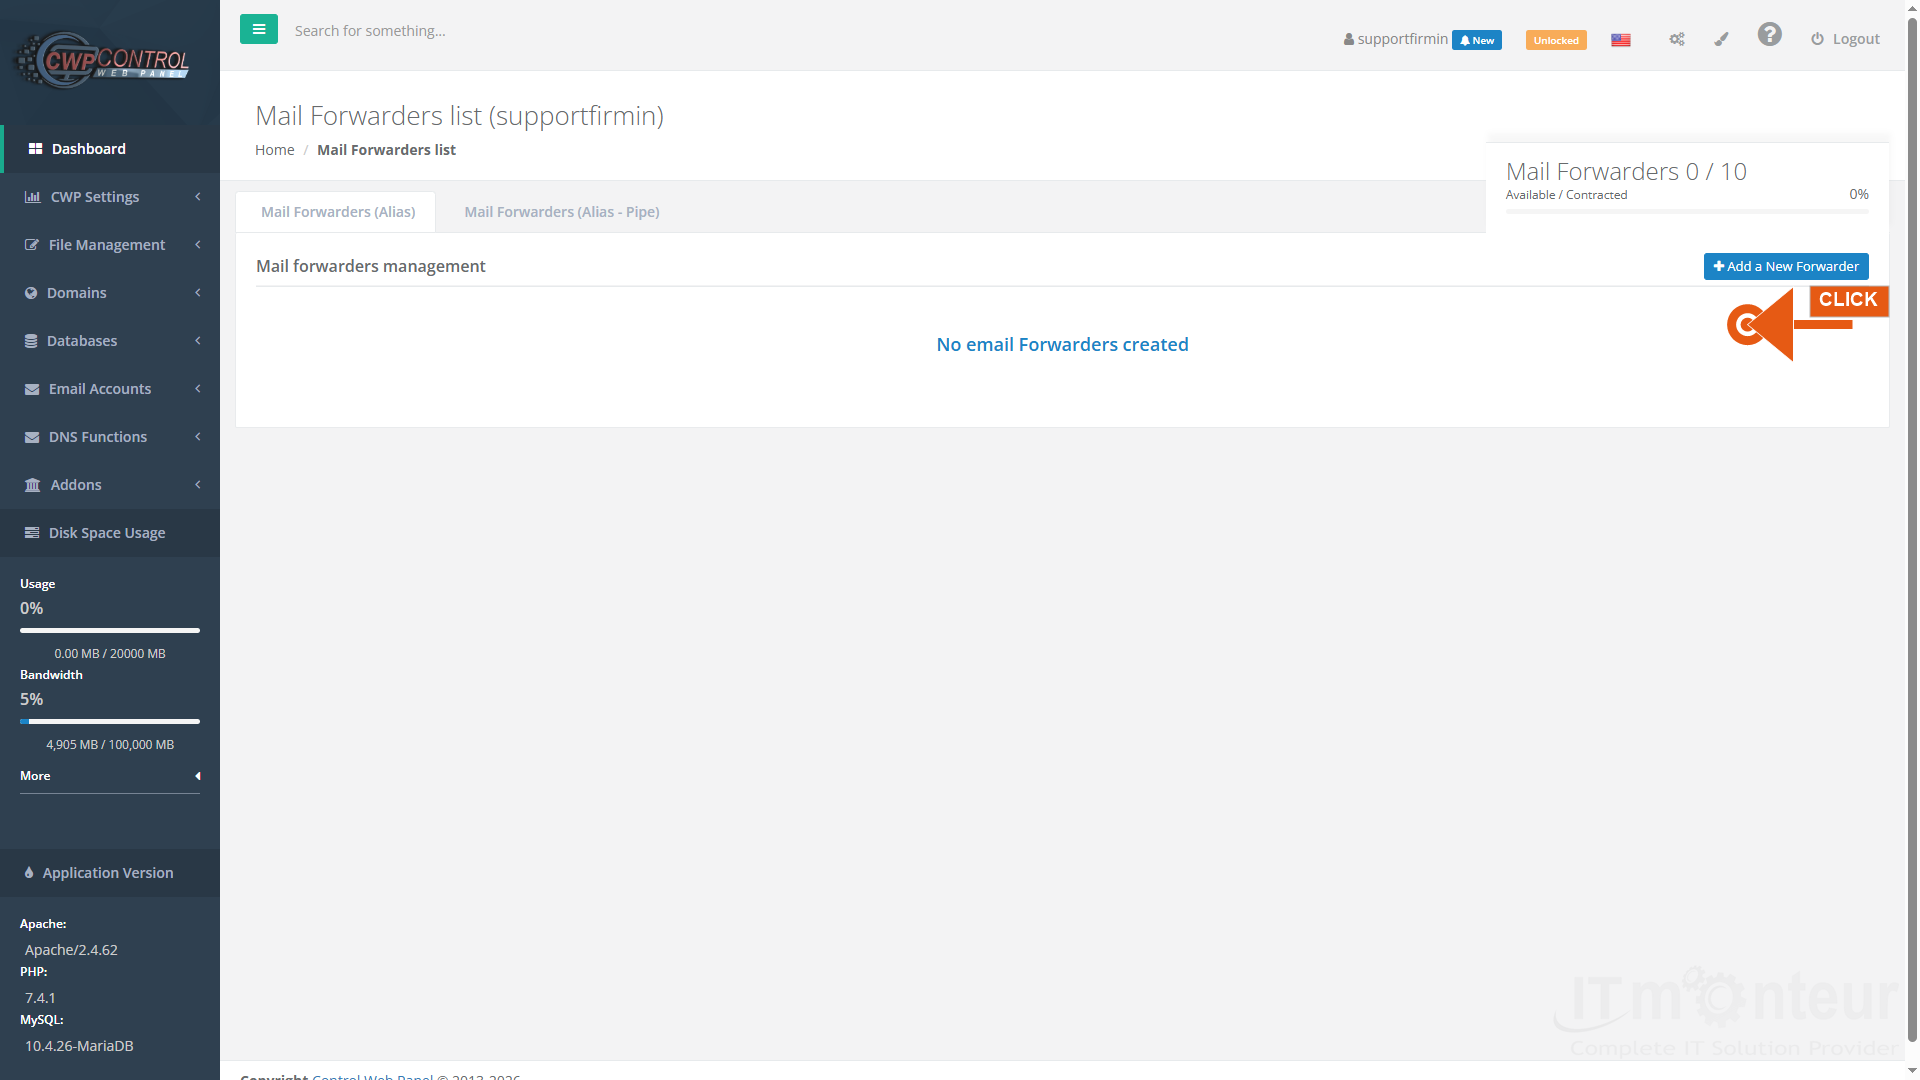
Open Email Accounts → Email Forwarders. Use the Mail Forwarders (Alias) tab. Click Add a New Forwarder.

Step 1 — Mail Forwarders list. Click Add a New Forwarder. -
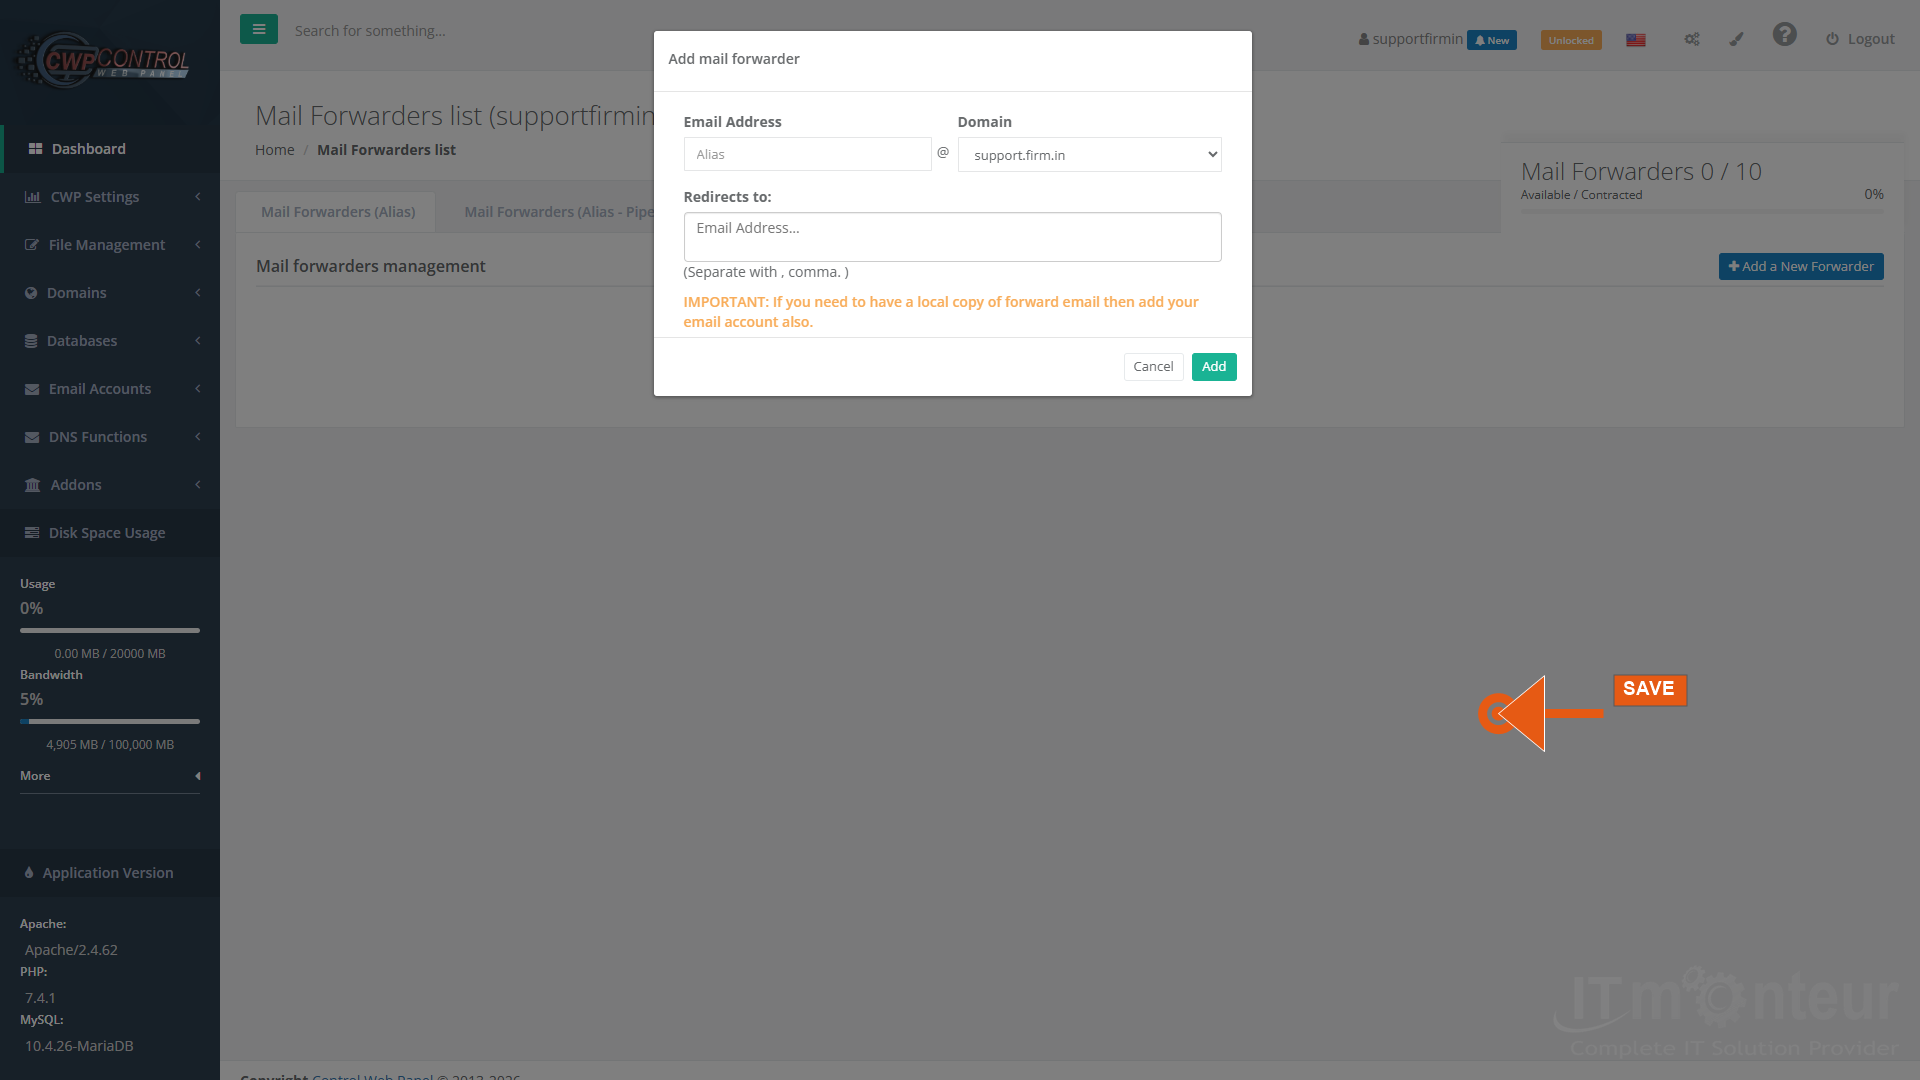
On Add mail forwarder: enter the Alias (example:
sales), choose Domain, enter Redirects to (example: admin@yourdomain.com). Separate multiple destinations with commas. Click Add.Step 2 — Add mail forwarder form (sales@domain → admin@domain). -
Send a test message to the alias and confirm it arrives at the destination.
Managing Forwarders
- Edit or delete forwarders from the list when addresses change.
- Use the Mail Forwarders (Alias – Pipe) tab for advanced pipe-to-script delivery.
Notes
- If you also need a local copy in a mailbox, add that mailbox address in Redirects to as well.