WebMail
  Support
How to Create an Email Account
Panel path: Email Accounts → Email Accounts
Step-by-step: create a mailbox like info@yourdomain.com, set a password and quota, then test in webmail or Outlook.
Before you start
Your domain must be added under Domains, and your plan must have free mailbox slots (for example Email 1 / 10 Available). MX should point to this hosting if you want mail delivered here.
Create the email address
-
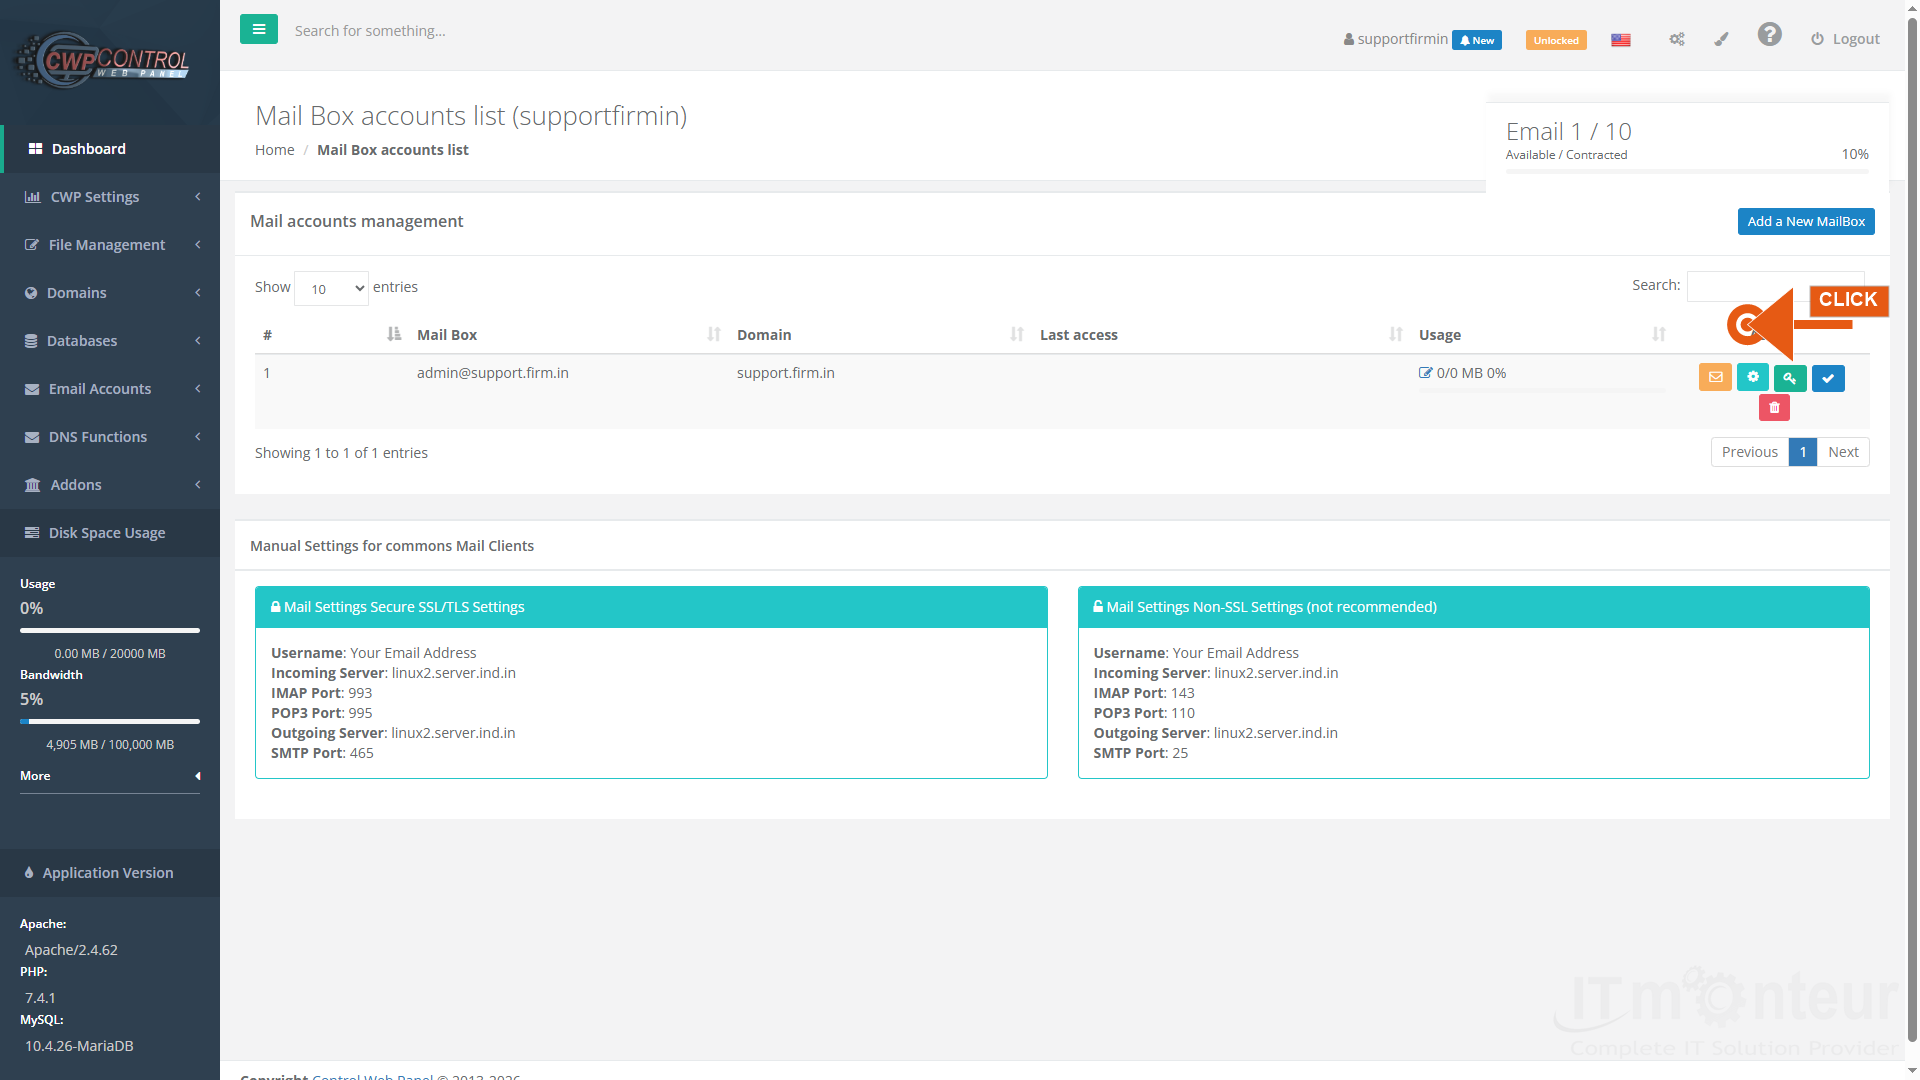
Open Email Accounts → Email Accounts. You will see the Mail Box accounts list and the blue Add a New MailBox button.

Step 1 — Mail Box accounts list. Click Add a New MailBox. -
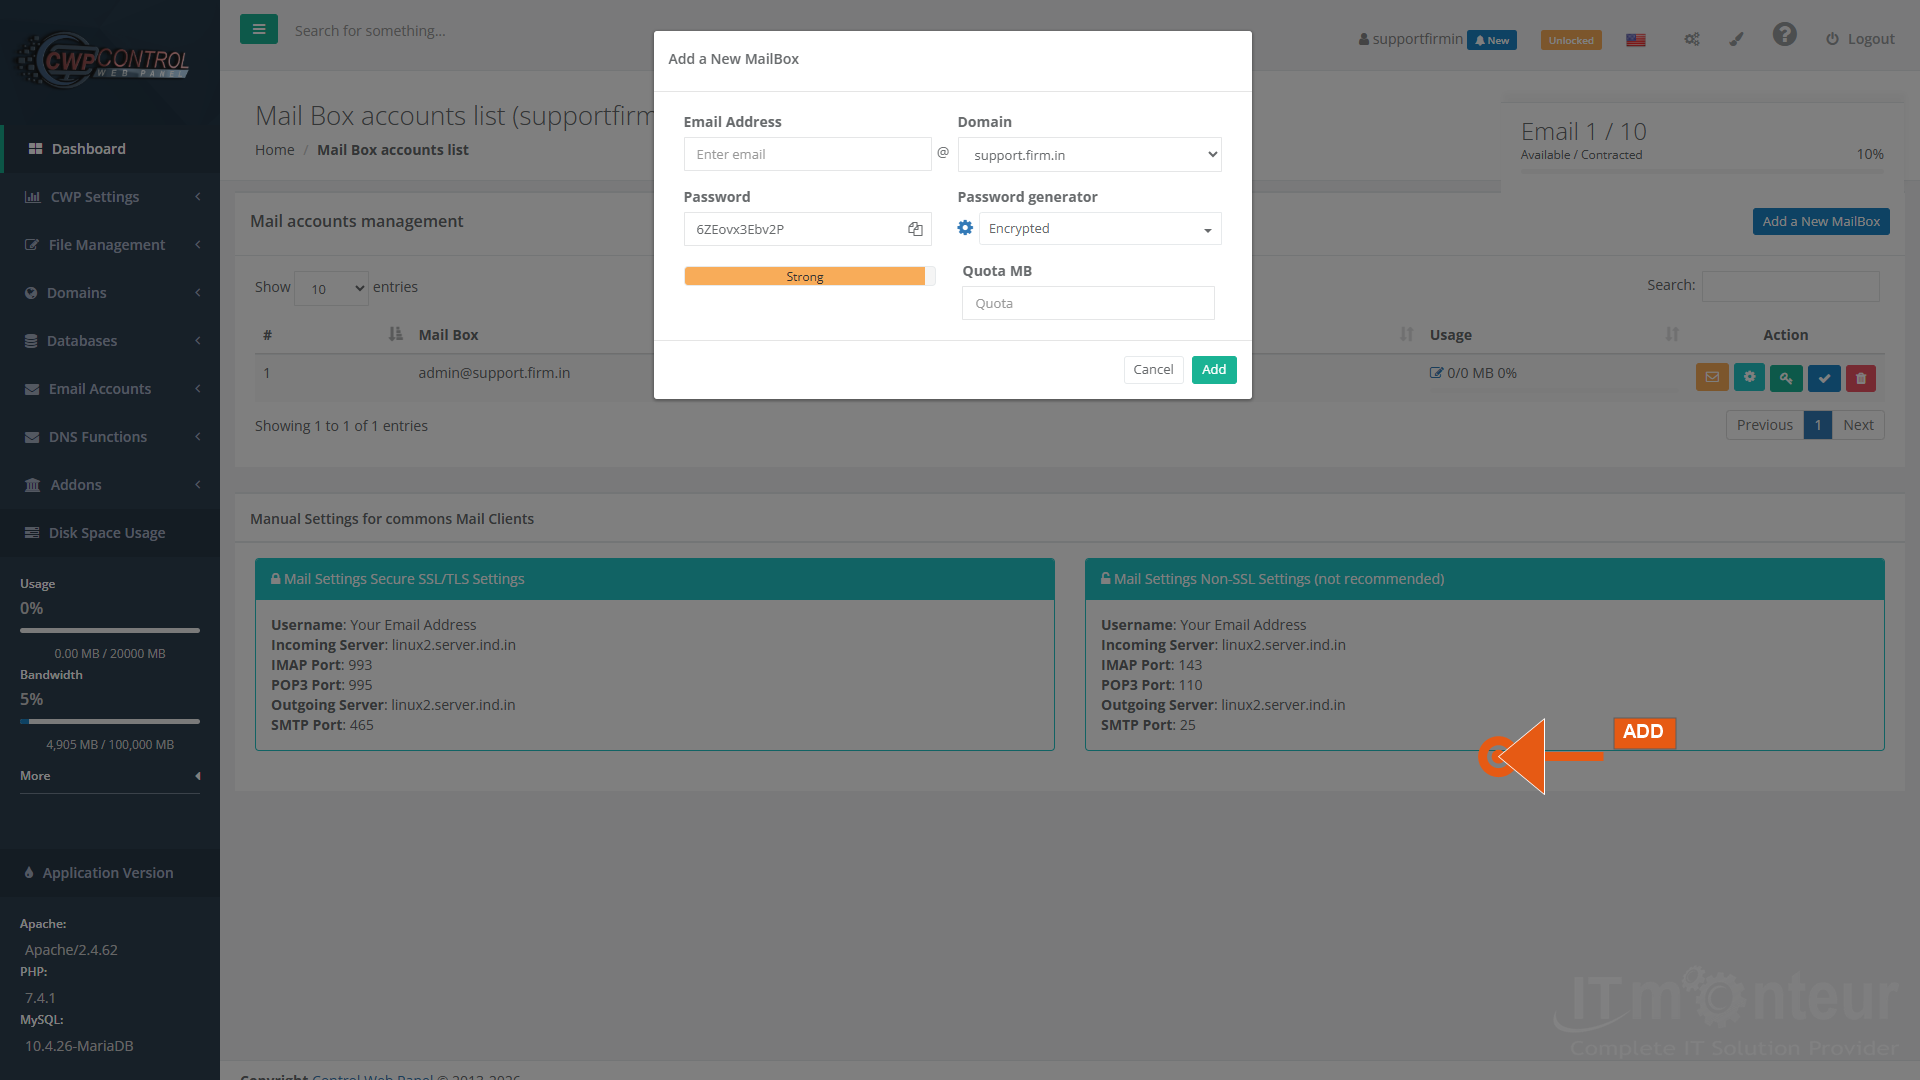
On the Add a New MailBox form: enter the Email Address local part (example:
info), choose the Domain, set Password (or use the generator), set Quota MB, then click Add.Step 2 — Add a New MailBox form (example: info@yourdomain.com, Quota 500 MB). -
After creation, the mailbox appears in the list. Use the envelope icon for Roundcube webmail, the key icon to change password, gear for settings, or trash to delete.
-
Test sign-in in Roundcube with the full address (info@yourdomain.com) and the mailbox password. Then configure Outlook using Manual Settings (IMAP 993 / SMTP 465).
Managing mailboxes
- Delete: red trash icon on the mailbox row (confirm carefully).
- Suspend: use the suspend control when you need to disable login temporarily.
- Change password: green key icon on the mailbox row.
- Resize quota: use mailbox edit / resize controls when your plan allows.
Notes
- Never reuse weak passwords; use a unique strong password per mailbox.
- Creating the mailbox alone is not enough for deliverability — also confirm MX, SPF, and DKIM (see DNS manuals).